
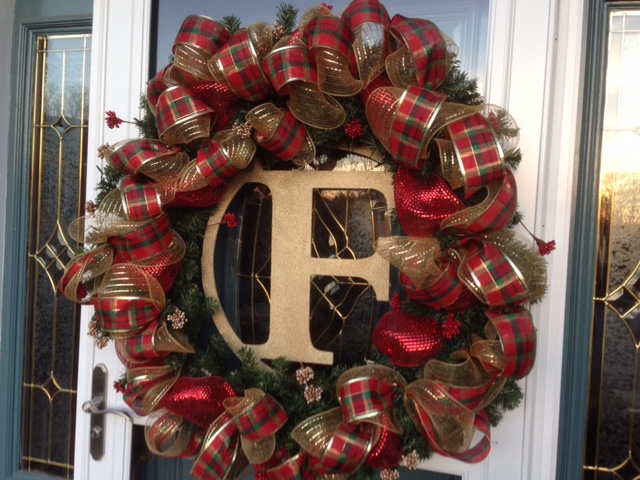
A personalized wreath on your front door says “Welcome Friends” in style.
As my friends and family know, I love to decorate my front door to match the season. I usually create something new, and since I rarely have a pattern or instructions, it’s always an adventure. This year I wanted a festive holiday wreath that featured our family surname monogram and small twinkle lights. What do you think of this DIY holiday idea?
How to create a personalized Christmas wreath:
Supplies:
Artificial pine bough wreath (24” as shown)
Wooden initial
Gold glitter spray paint
Mesh ribbon in red (6” width as shown)
Mesh ribbon in gold (6” width as shown)
Festive holiday ribbon (3” width as shown)
Mini twinkle lights (battery powered)
Small decorative floral picks (I used red and gold berries)
Floral wire; Scissors
Wire cutters if desired (I just use scissors)
Instructions:
Step 1: Paint your initial.I found a monogram circle with the letter “F” at a local craft store, but I didn’t like its plain brown color. I chose to spray it with a sparkly gold glitter paint.
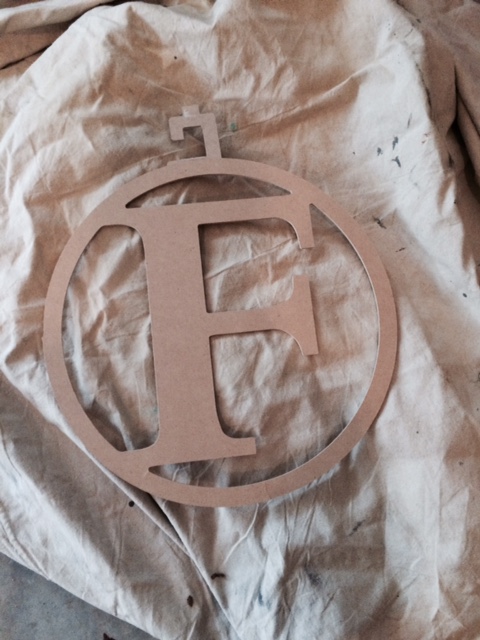
Here’s how the initial looked before I painted it.
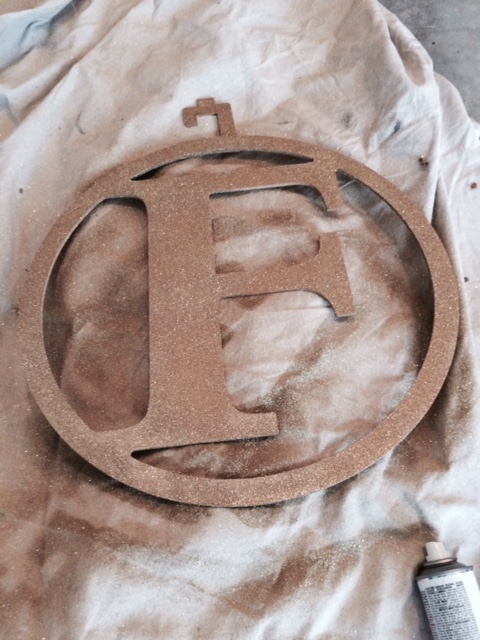
A quick coat of sparkly gold glitter paint gives this monogram instant flair.
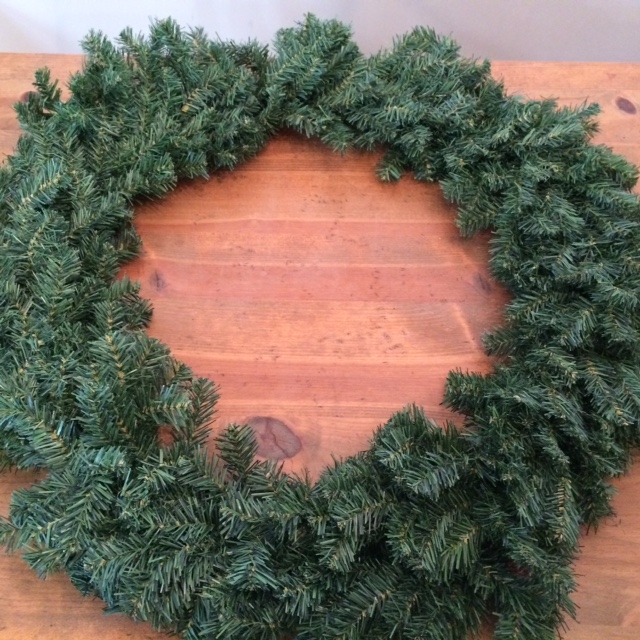
This project starts with a plain faux pine bough wreath such as this.
Step 2: Attach the monogram to the wreath.Once it had dried, I attached the monogram to the wreath using green floral wire.
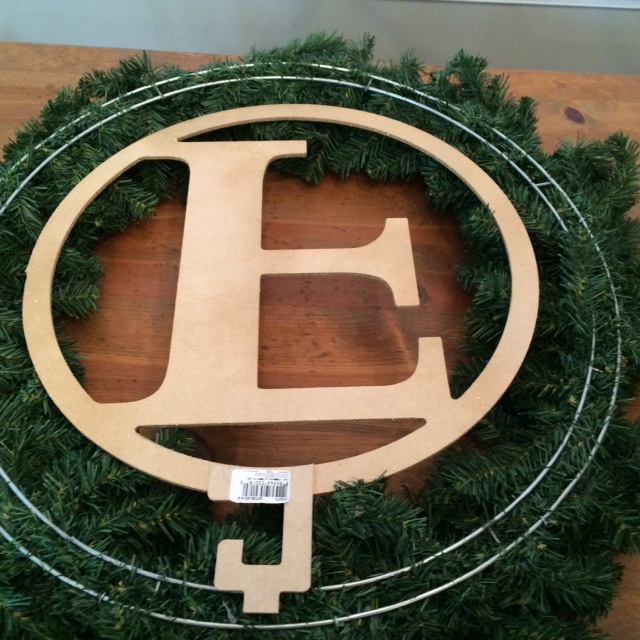
Be sure to wire your monogram at several different points along the wreath to ensure stability.
Step 3: Add the first layer of mesh ribbon. I started with the red mesh ribbon for my first layer. Start by securing one end of the ribbon to the wreath using floral wire. Next, pinch the ribbon together and attach it at equal intervals around the wreath using floral wire. You can also use an individual branch of the wreath and twist it around the ribbon to secure it instead of wire.
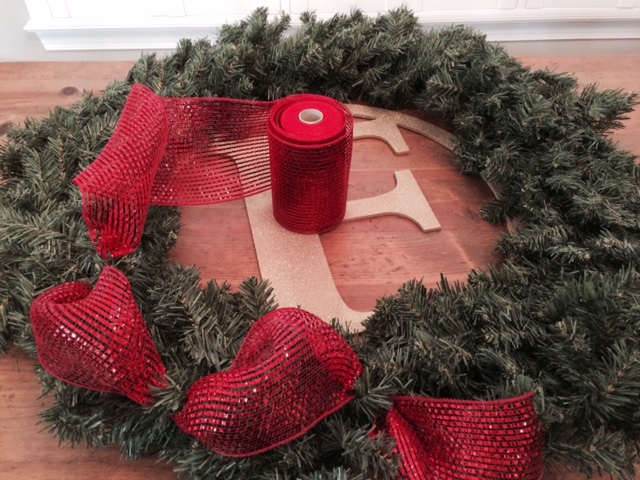
Start with one color of mesh ribbon and attach it as you go around the wreath.
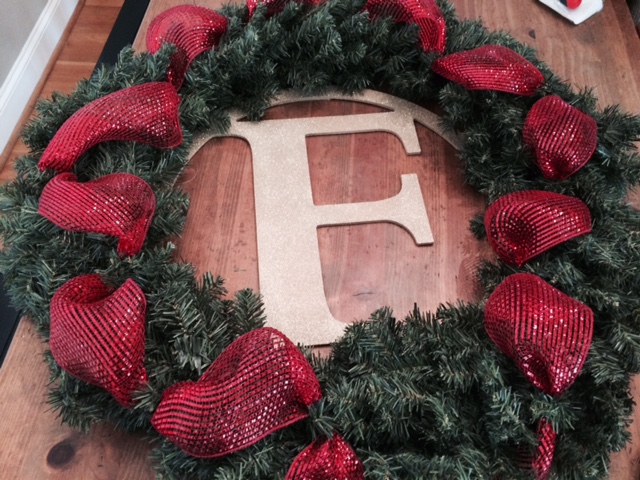
This is how my wreath looked after the first layer was complete.
Step 4: Attach a second layer of ribbon. Tie your second wire mesh ribbon (gold for mine) and your decorative ribbon together and then attach to the wreath. Now extend, pinch and attach to the wreath in small sections, filling in around the areas covered by the first mesh ribbon layer.
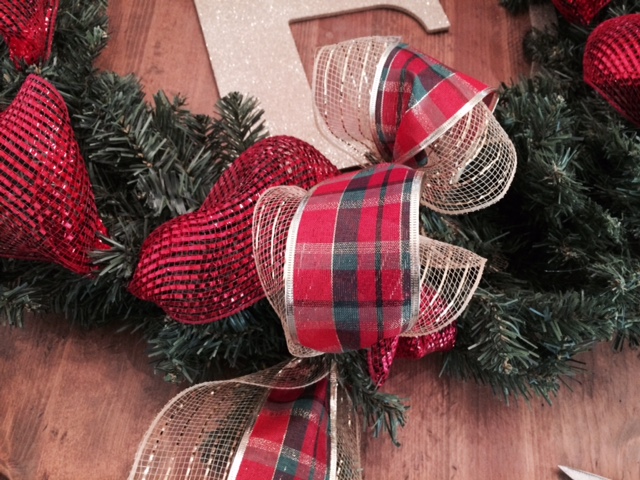
Choosing a decorative ribbon that is narrower than your wire mesh ribbon results in a nice layered effect when they’re combined.
Step 5: Attach the lights.Attach the lights after the ribbon so that the lights don’t end up covered by the ribbon. Start at the bottom of the wreath–where you’ll want the battery pack behind the wreath, resting it inside a loop of ribbon.
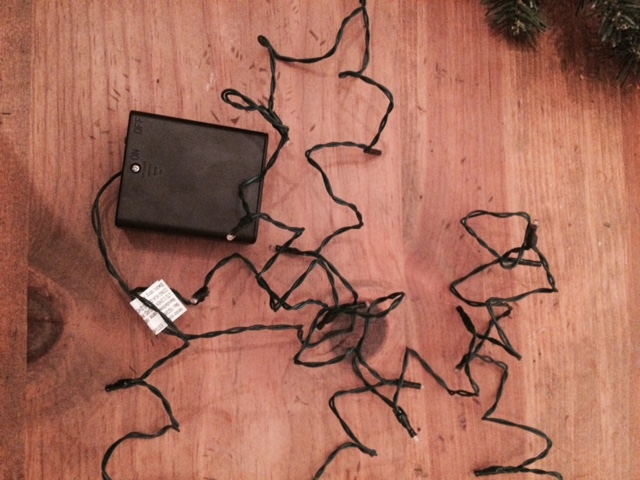
These cordless battery-powered lights are perfect for wreaths.
Step 6: Add finishing touches.Now that the wreath is nearly complete, use some decorative picks to create that finished look. I chose red and gold berry picks and twisted them around the branches randomly across the wreath. I also created a few groups of 2-3 picks together and put some reds next to other reds so it didn’t look too matchy-matchy.

Choose floral picks that complement your color scheme and add a smaller-scale design element.
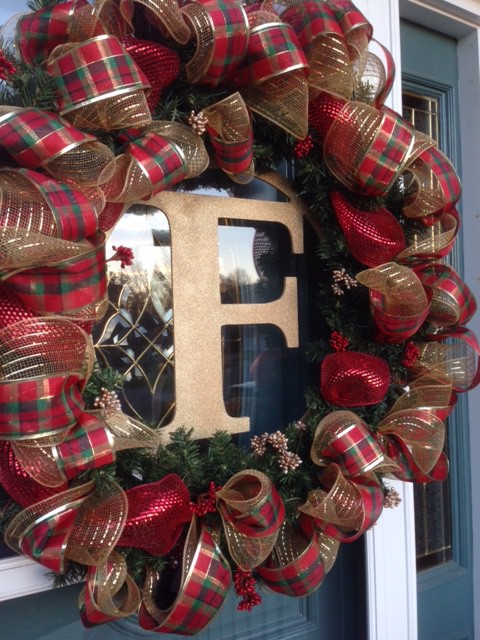
While this wreath uses gold as an accent color–it would work equally well with silver or another hue. Just define your color palette beforehand and stick to it!
Here’s a look at a few more of my favorite holiday wreath inspirations:
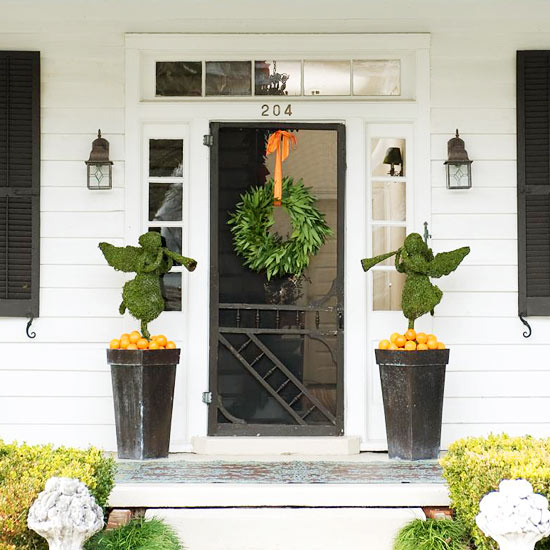
A natural take on the holiday wreath, this look features fresh greenery and citrus accents. Photo credit: bhg.com
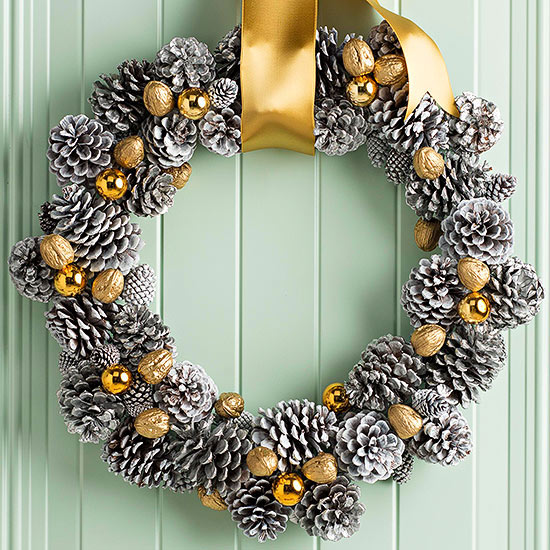
Non-traditional colors–like this combination of mint, gold, white and brown–make a striking visual. Image: bhg.com
So what’s going on your door this holiday season? Something you purchased or a wreath of your own creation? Tell us about it, here in the comments!


{ 0 comments… add one }